Farm Fresh Cucumbers
To learn how I turned this 25 pound box of pickling cucumbers into........
.......these 39 pints and 5 half-pints, continue reading.
Homemade pickles & relish
Since my cucumbers were all but smothered by the summer squash, I decided to purchase a 25 pound box of pickling cucumbers from my local produce market. It took me four days of pickling, but I finally worked my way through, only having to discard 2 cucumbers.
~~~~~~~~~~~~~~~~~~~~~~~~~~~~~~~~~~~~~~~~~~~~~~~~~~~~~~~~~~~~~~~~~~~~~~~~
How to Make Dill Pickles
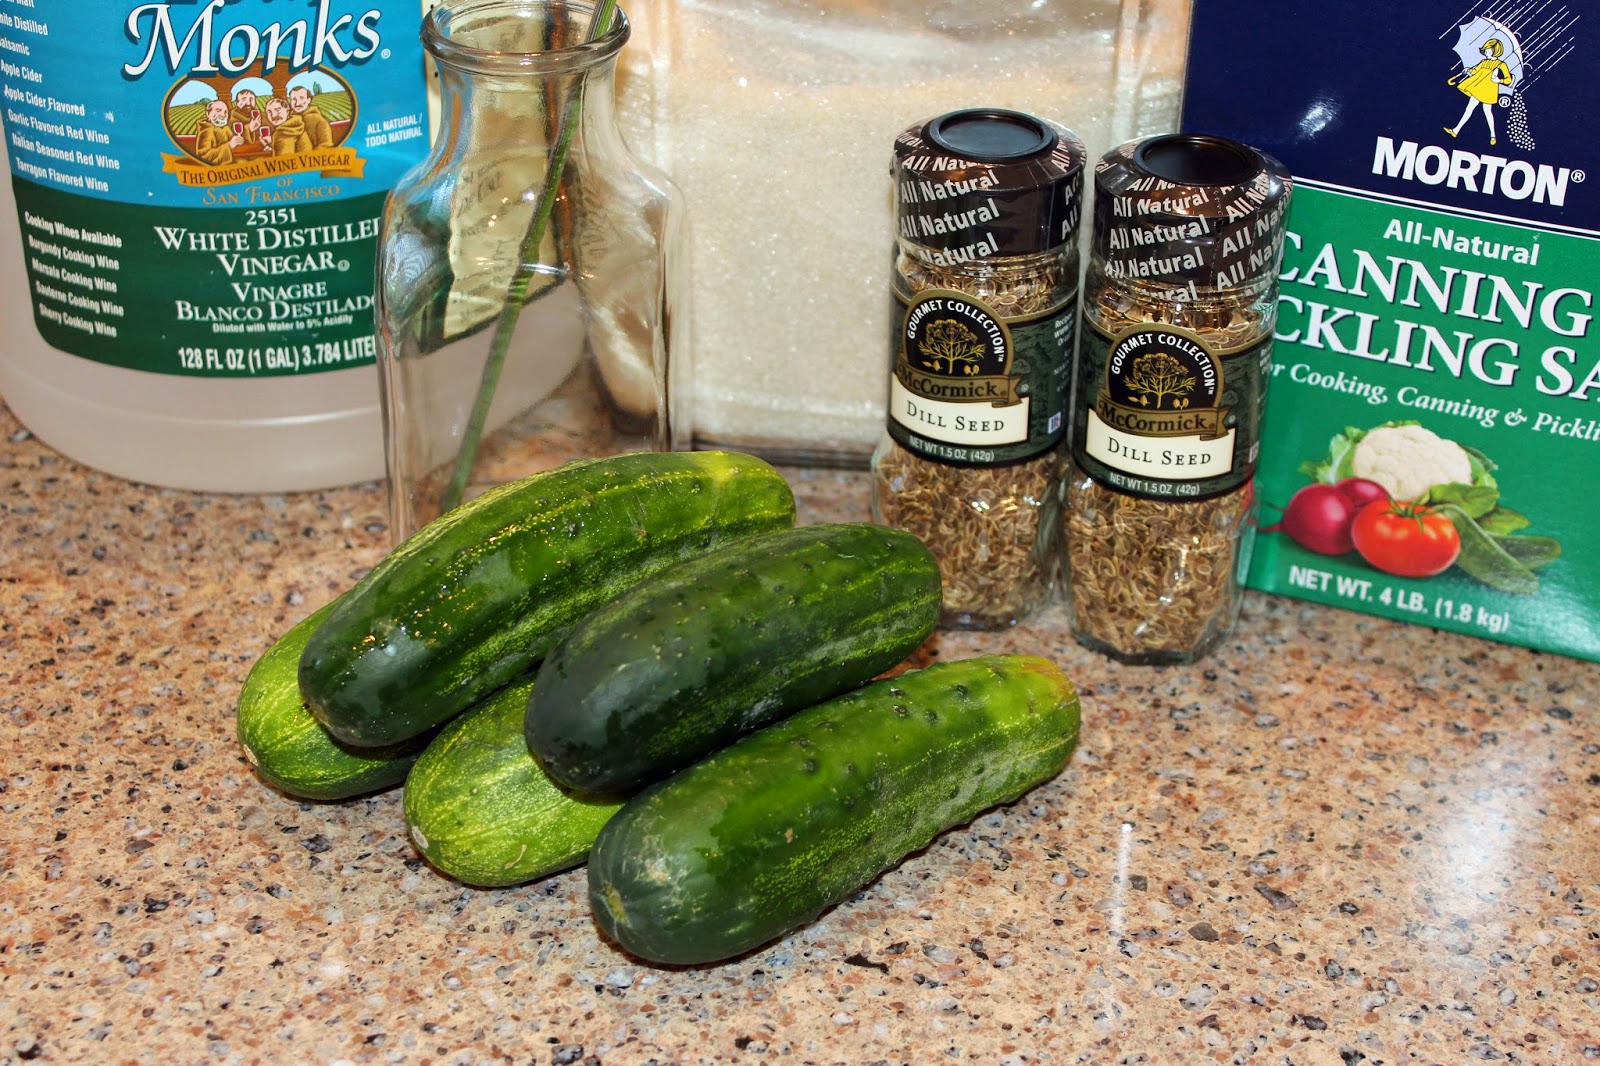
A few simple ingredients for dill pickles
If you've never canned foods before, dill pickles are probably the easiest thing you could start with. The only real prep work involved is slicing the cucumbers, either length-wise for spears or cross-wise for chips.
Ingredients you'll need for 6 pints (I like using wide mouth jars for pickles):
6 pint jars, washed & heated
3- 3 1/4 pounds 4-inch pickling cucumbers
4 cups water
4 cups white vinegar
1/2 cup sugar
1/3 cup pickling salt
6 tablespoons dill seeds
Heat a couple extra jars and have some extra cucumbers on-hand. This amount of brine was enough for me to make 8 pint jars. I actually doubled mine so I was able to get 16 pints of pickles.
Dried dill seed head from the garden
Shop around for dried dill seeds. The first store I found them in, they were $8.49 for 1.5 oz jar. Another store they were $4.29. Such a huge difference! This dried seed head came from my garden. You can bet I'll be saving my seeds this year and planting more dill next year.
If you're making dill chips for burgers and sandwiches, slice them cross-wise. When slicing, I measured about 1.5 - 1.75 cups per pint jar. So if you're making 6 pints, you'll need 9 - 10.5 cups of sliced cucumbers. For dill spears, you'll want to quarter the cucumbers length-wise. I was able to fit 12 or so spears into each pint jar.
Place the jar lids in a small pot of water and bring to a simmer to heat the sealing edges. Keep lids hot while following the next steps.
Fill a large stock pot or your water bath canning pot with enough water to cover the pint jars by 2-3 inches. Be sure your jar rack is placed in the bottom of the pot. Either heat your jars in the water or use the heat dry cycle on your dishwasher. Once your canner water & jars are hot, heat your pickle brine.
In a large pot, combine the water, vinegar, sugar & salt. Heat to boiling, stirring to dissolve the sugar and salt. Keep brine hot while packing jars.
Hot jars filled with cucumbers & dill seeds
Pack your hot jars with cucumbers, not too tightly. I filled mine to the natural neckline of the jar, pressing gently, leaving 1/2 inch headspace (the space between the top of the cucumber and the top of the jar. Next, pour 1 tablespoon dill seed into each jar.
Jars filled with cucumbers, dill & brine. Ready for lids and bands
Using a wide mouth canning funnel, ladle hot brine over cucumbers and dill seed, maintaining 1/2-inch headspace. The cucumbers will float a little, but I found that as long as they have space to sink back down, the headspace was ok.
Next, wipe jar rims with a clean, damp cloth and place heated lids on top of jars and screw bands on until "finger-tip tight". If you screw them on too tightly, air can't escape.
Jars placed in canner, ready to process
Using a jar lifter, place each jar in the canner, making sure there is 2-3 inches of water covering the top of the jars. Place lid on canner and return to boiling. Once the water has begun to boil, start your timer for 10 minutes. You can reduce the heat and crack the lid if necessary, but be sure to maintain a boil. After 10 minutes of processing, turn off stove, remove lid and set timer for 5 minutes. After the jars have rested for 5 minutes, remove them with the jar lifter and place on a towel. Leave them undisturbed until cool.
Dill pickles will need to sit at room temp for a week to develop the flavor.
Dill Chips
Dill Spears
~~~~~~~~~~~~~~~~~~~~~~~~~~~~~~~~~~~~~~~~~~~~~~~~~~~~~~~~~~~~~~~~~~~~~~~~
How to Make Bread & Butter Pickles & Sweet Relish
A little prep-work for bread & butter pickles
Making sweet pickles is easy, but requires a little more planning and prep-work than dill pickles do. Once sliced, the cucumbers, onions & salt need to be refrigerated for 3-12 hours. It's something that can be done at night if you plan to make the pickles the following morning.
Ingredients you'll need for Bread & Butter Pickles or Sweet Relish
Here are your ingredients for 7 pints of Bread & Butter Pickles:
7 Pint jars, washed & heated (Have a couple extra on-hand. I was able to get 8 jars from this recipe)
16 cups sliced pickling cucumbers
8 medium white onions, sliced (I used 5 large-ish onions)
1/3 cup pickling salt
3 garlic cloves, halved
crushed ice
4 cups sugar
3 cups cider vinegar
2 Tablespoons mustard seeds
1 1/2 teaspoons ground turmeric
1 1/2 teaspoons celery seeds
Cucumbers, onion & garlic ready to be topped with ice
In a large 6-8 quart stainless steel, enamel, or non-stick heavy pot, combine sliced cucumbers, sliced onions, garlic and pickling salt. Stir to combine well. Top with 2 inches of crushed ice, cover and refrigerate 3-12 hours.
After refrigeration, remove any ice and pour cucumber & onion mixture into a colander to drain, remove garlic and discard.
While letting the cucumbers & onions drain, combine sugar, vinegar, mustard seeds, turmeric & celery seeds in the large stock pot. Bring mixture to a boil, stirring to dissolve sugar. Add cucumber & onion mixture, return to boiling and then remove from heat.
Cucumber & onions mixed with brine & spices
Pack hot cucumber mixture & liquid into hot jars, leaving 1/2 inch headspace. Wipe jar rims, place lids & screw bands on jars. Process for 10 minutes in a boiling water bath. Let rest for 5 minutes before removing jars. Place hot jars on dish towel to cool.
Bread & Butter Pickles
~~~~~~~~~~~~~~~~~~~~~~~~~~~~~~~~~~~~~~~~~~~~~~~~~~~~~~~~~~~~~~~~~~~~~~~~
How to make Sweet Relish
Finely chopped cucumbers, red bell pepper & white onion
Making sweet relish is very similar to making sweet pickles. I'll quickly go over the ingredients & instructions here. I made 5 half-pint jars with this recipe.
5 half-pint jars, washed & heated
8 cups finely chopped cucumbers
1 cup finely chopped red bell pepper
1 cup finely chopped white onion
1/3 cup pickling salt
2 1/2 cups sugar
1/4 teaspoon black pepper
3 teaspoons mustard seeds
1/4 teaspoon ground turmeric
1/4 teaspoon celery seeds
2 cups white vinegar
In a large bowl or pot, combine finely chopped cucumbers, onions, red bell pepper and 1/3 cup pickling salt. Cover with 1 inch of water and cover tightly. Let set in a cool room at least 8 hours, but no more than 18 hours.
After these 8-18 hours, working in batches if necessary, drain mixture in a fine mesh sieve while rinsing in cold water. Place drained mixture in a colander lined with cheesecloth to continue draining. Twist cheesecloth around mixture to squeeze out as much water as possible. You might be surprised by how much water is left even when you think it's drained long enough. Leave mixture sitting to drain more while you continue to the next step.
In a large pot, combine sugar, black pepper, mustard seeds, turmeric, celery seeds & vinegar. Bring mixture to a boil, stirring to dissolve sugar. Add drained cucumber mixture and return to boiling. Reduce heat and simmer about 15 minutes or until cucumbers are translucent and mixture is slightly thickened.
Ladle into hot jars, leaving 1/2 inch headspace, remove air bubbles, wipe rims, place lids and rings on jars. Process in a water bath canner for 10 minutes, let jars rest another 5 minutes before removing. Place jars on a dishtowel and leave for 24 hours to cool.
Sweet Pickle Relish
After 4 days of pickling, I ended up with:
12 pints Dill Spears
11 Pints Dill Chips
16 Pints Bread & Butter Pickles
and
5 half-pints Sweet Relish
It was fun making all of those pickles, but I don't want to see another cucumber until next Summer!