Thursday, June 5, 2014

Veggie Plantings & Garden Update for May 27th

 May 27th- Heirloom Tomato Plants

We had beautiful weather on Memorial Day, so I headed out to the garden to plant the heirloom tomato plants....2 each of....Yellow Pear, Black Cherry, & Sweet 100 (Three small varieties perfect for salads)
Yellow Plum & San Marzano (Plum variety)
Mortgage Lifter, Aunt Ruby's German Green, & Cherokee Purple
All purchased through D. Landreth

May 27th- Tomato, San Marzano 

 May 27th- Tomato, Mortgage Lifter

May 27th- Hot & Sweet Pepper plants

Some of the peppers have been difficult for me.  I had 3 varieties of hot pepper that needed to be planted 3 times before they would germinate!  I still have the seedlings from those varieties in the house as they aren't ready to be planted.

May 27th- Hot & Sweet Pepper plants

I have orange sweet pepper seedlings ready to be planted in the garden soon.  The first pair of seedlings died from damping off.

May 27th- Pole Beans, Lettuce, Spinach & Beets

My husband and I made teepees for the pole beans and then planted a couple of beans at each leg. 
Varieties in this bed include: Blue Lake Stringless, Landreth Stringless, Florida Speckled Butter Bean (Lima), & Christmas Pole Lima.
All purchased from D. Landreth

There are also different varieties of head lettuce, 2 varieties of spinach & 1 variety of beet planted along the edges of the beds 

May 27th- Pole Bean


May 27th- Peas, Bush Beans, Leaf Lettuce, Swiss Chard, Endive

More of the same seeds will be planted in the empty areas.  Hoping I can get a couple more plantings in before the summer heat sets in, which isn't usually until July & August.

May 27th- Arugula- left, 2 varieties of Turnip- center & right, Red Mustard- far right

I'll plant another row of arugula & turnips in the next week or so. 

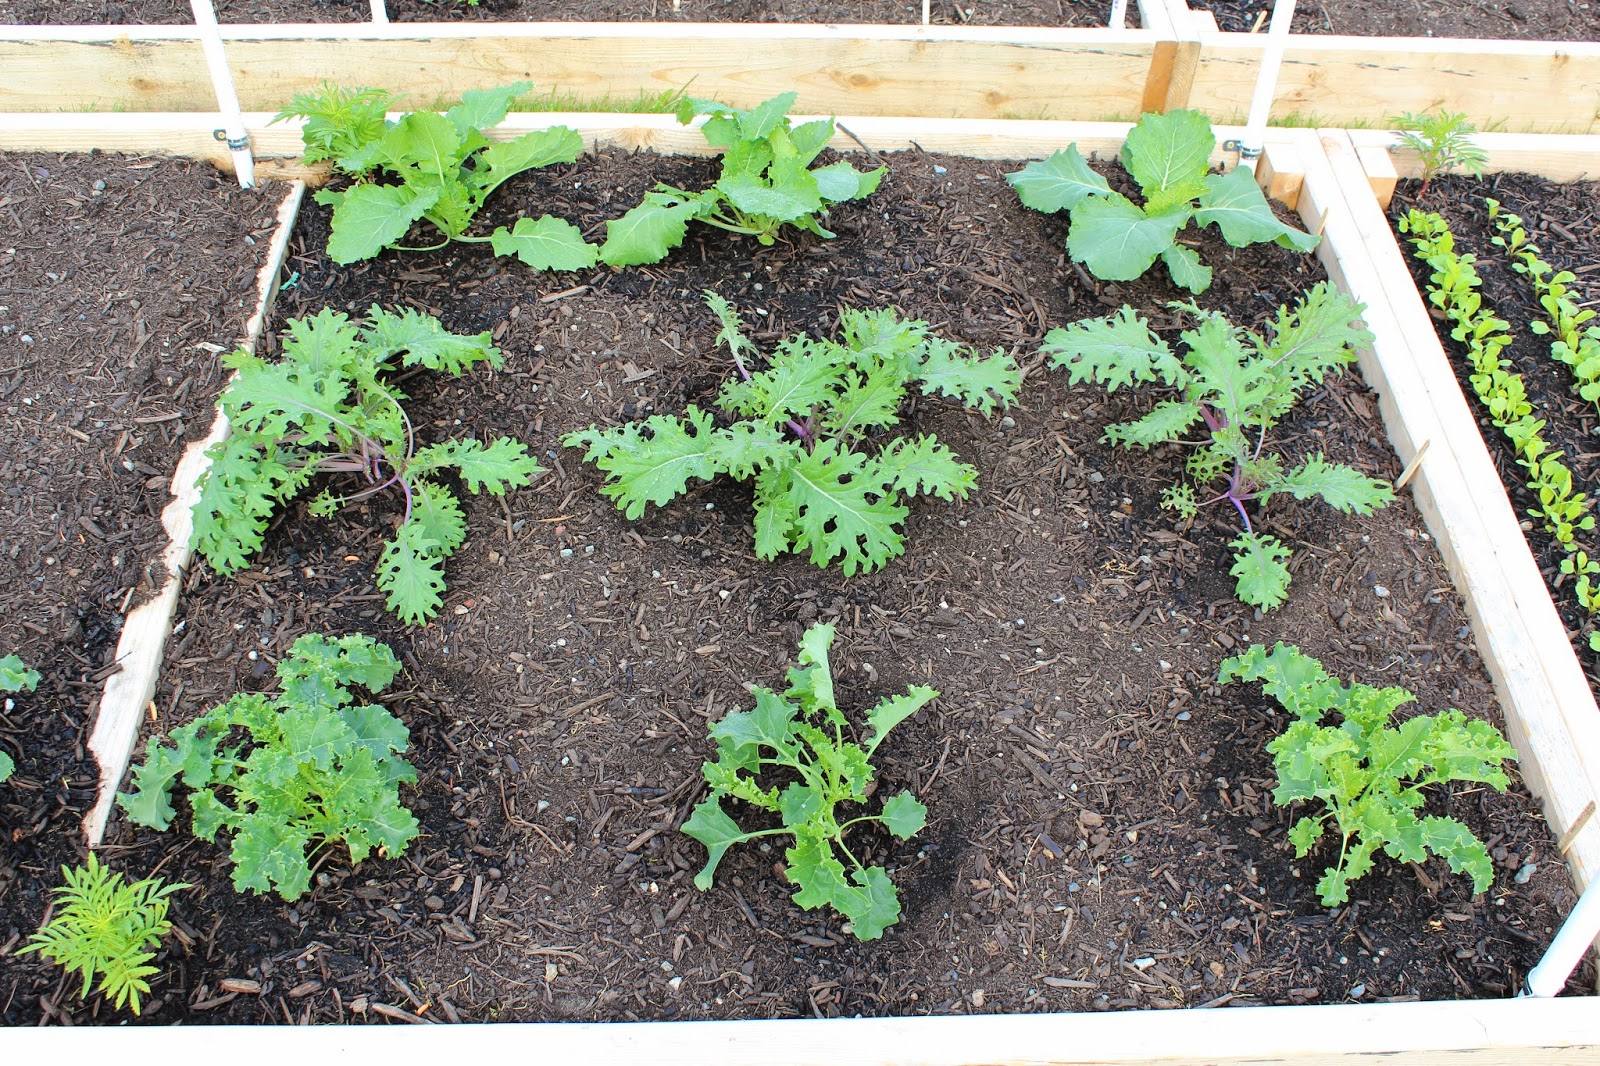
May 27th- Radish- foreground, Kale- right, Collards & Kale- center bed

More collard & kale seedlings are almost ready for planting to fill in this bed.

May 27th- Cabbage & Arugula (far bed), & Cauliflower (center bed) 


 May 27th- Arugula planted in the same bed as cabbage


May 27th- 3 rows of Carrots, 

Carrot varieties are: Tonda Di Parigi, Nantes Scarlet Half Long, & Little Finger
All heirlooms and purchased from D. Landreth
Parsnips are planted in this bed as well- Heirloom Hollow Crown.  Another row of each will be planted in the next week or so. 

May 27th- Celery


May 27th- Cucumber on the left, Summer Squash on the right 


May 27th- Winter Squash....newly planted Butternut squash seedlings in the foreground bed

I had some difficulties with the butternut squash seedlings and ended up starting 2 new seedlings indoors.  They'll catch up with the Acorn & Spaghetti Squash plants before too long.  You can see the mesclun mix growing as well. 

May 27th- Onions 


May 27th- One of several Marigolds planted throughout the garden beds

Hope you're enjoying the garden updates as much as I'm enjoying sharing.  Tomorrow I'll update with the first harvest and how I cooked it.

Wednesday, June 4, 2014

Planting the Vegetable Garden


 An obstacle course?  No, just the garden on May 14th

Once the garden construction was complete and the beds filled with black gold, I felt like Spring was almost gone and I'd missed the mark on planting time.  All along I'd imagined having the cooler temp veggies (peas, beans, kale, collards, salad greens, etc) direct sown in the garden sometime in early April.  When the calendar pages flipped to May and the garden beds sat with just compost in them, I was worried I'd missed the ideal planting times.


 May 6th- Winter Squash & Marigolds

Once May 6th arrived, I wasn't going to wait any longer.  The seedlings had spent plenty of warm days and cool nights outside that I felt they were ready to live in the garden. Night time temps were steady in the 40's and hadn't dropped to freezing in a couple of weeks. 

May 6th-- Acorn & Spaghetti Squash plants

I only planted a few seedlings in the ground that day.

May 6th- Cucumbers on the left, Summer Squash on the right


May 14th- Winter Squash, Marigolds & Mesclun seeds planted

A week later and the winter squash plants are happy & growing.  I decided to plant some mesclun seeds at the empty corners.  By the time the squash plants overtake the beds, the temps will probably be too warm for the lettuces & they'll be pulled out.

May 14th- Cucumber, Summer Squash & Marigold


May 14th- Peas, Bush Beans, Lettuces, Swish Chard, & Endive seeds were direct-sown

May 14th- Cabbage in the far end, cauliflower in the middle & broccoli in the foreground

I had some issues with the broccoli seedlings, so I only ended up with 2 plants to start with in the garden.  As of this posting, I have a few more seedlings ready to be planted and will try direct-sowing a few more seeds and see what happens.

May 14th- Giant Red Mustard is growing well

May 14th- Cinderella Pumpkin in beginning to take off

May 14th- Squash

May 17th- A baby Cinderella Pumpkin

May 17th- Mesclun seeds have germinated

May 17th- Radishes have sprouted

Even though I may have missed my original planting schedule, it still wasn't too late to plant.  In fact, it may have been best to wait.  We had a lot of rain in April and if I would have planted the seeds as early as I'd like to, they would have been washed out or may have rotted in place. We had "just enough" rain in May.  It would rain a little and then would be sunny for a few days.  On dry days I'd water the garden a few times a day to keep the soil moist around the seeds until they germinated.  When it did I'd worry about powdery mildew (and still do a little) on the squash, but I haven't seen any signs of it yet. 

There's more garden planting & growing updates for May.  I plan to post those tomorrow and hope to get caught up so I can stay current in June.  
Thanks for reading, check back for more planting & harvesting! 

Friday, May 30, 2014

Flower & Veggie Seedlings

Before I share about planting the garden, I should probably share about growing the seedlings first.  I had big dreams for our first garden on our new homestead.  Originally, I had planned to start our garden last Fall with some cold hardy crops so, planning in advance,  I had ordered seeds even before we arrived at our new house!  However, the Fall garden did not happen and it's probably best that we waited.  We really needed that time to settle in and unpack the house and if we would have started construction in the Fall, I don't think we would have the garden that we have now.  It really did take us a while to figure out the best layout and whether the location would be ok.  We have a large fenced yard, but we also have a septic and drain fields that we needed to avoid.  Anyway, before all of that construction began, I had little seedlings growing in the house.............

March 31st- Bottle Gourds, Nasturtium, Squash, Pumpkin & Melon

I thought that by having some seed packets already, I wouldn't have a very difficult time deciding on which other ones I should buy.  I was so wrong!  I wanted to order almost everything I saw in the seed catalogs.  I started out by ordering from D. Landreth Seed Company I had ordered from them before and like their "Seeds In A Sack".  I ordered their "Heirloom Seed Collection", "Heirloom Tomatoes", "The Second Season", & "Gourmet Greens".  Then I ordered even more individual packets after that!  I also ordered from Baker Creek Heirloom Seeds & Territorial Seed.  And even picked a few seed packets up at the local home improvement store.  After all was said and done, I had over 100 seed packets.  What was I thinking?!


March 31st-  Sunflowers & Cucumbers

In my defense, they weren't all vegetable seeds so we wouldn't need a garden that big.  There were plenty of herb & flower seeds in the mix.

 March 31st- Marigold, Zinnia & Zuchinni

After purchasing several seed starting trays and seed starting medium, I began planting those tiny little seeds and making plant markers with popsicle sticks and a sharpie.  It took me hours & hours over the course of a few weeks to finally get everything planted.  I used a mix of the 72 cell trays and small 18 pot trays.

March 31st- Bottle Gourds, Winter Squash, Pumpkin & Melon

A lot of the seeds germinated and grew pretty well.  Others...not so much.  I was having a problem with damping off and fungus gnats.  I decided to sterilize the remaining seed start mix in a disposable aluminum turkey pan covered in foil and try replanting.  Some of the seeds germinated & grew, but I didn't see a lot of difference in the damping off problems I was having.

 March 31st- Rouge Vif d'Etampes Pumpkin (Cinderella Pumpkin)

A little discouraged, but not one to give up, I decided to try a different brand of seed start mix.  I didn't feel like I had many options since I wanted to avoid all the brands who add chemical fertilizers.  I want to grow my food 100% chemical free right from the start.  After a little research, I discovered that a brand I'd seen many times in a local store was indeed certified organic.  I decided to buy a bag and give it a try. 
 April 13th- Marigolds

I saw a huge difference in the germination & growth rate of the seeds.  I still had a few problems, but they weren't anything like before.  

April 13th- Bottle Gourds, Nasturtium, Squash & Pumpkin

I kept tending the little plants, checking on them several times a day.  Once I felt they were large enough, I'd start sitting them outside on nice warm days to begin hardening them off. 


April 13th- Kale, Collards, Mustard, Impatiens & Coleus

I had quite a few seed trays growing and as some of the seedlings grew larger, I planted them up in the small 3 inch pots, others stayed in the small cell packs. 


April 13th- Seedlings were brought inside at night & on cold, rainy days

So...where did I grow all of these little food & flower makers?  My husband bought a metal utility shelf unit & 8- 4ft shop lights (each with 2 bulbs) at our local home improvement store and we set it up in the family room of course!  (I'll talk about the green house seen in some of the garden photos another day)


April 13th- 8 happy seed trays

In total I had 14 seed trays growing at once.  Only 8 would fit on the shelf unit, but planting was staggered so it worked out perfectly.  As seedlings were ready to be moved out during the day to begin hardening off, I had space on the shelves for newly planted trays.  

Check back next week for outside planting updates & the first harvest.  I am also going to the Mother Earth News Fair this weekend and I'm sure I'll have plenty to share about that next week!  

Thursday, May 29, 2014

The Vegetable Garden Construction Part 2

A continuation from: The Vegetable Garden Construction Part 1
Once the main construction was complete, we needed to add some braces in the 8 foot sections of each bed to prevent the sides from bowing out under the weight of the compost.  I forgot to take a close-up photo of that, so I'll try to just describe it.  A 2x4 was cut to almost the height of the taller sides and attached vertically to connect the 2x8 and 2x10.  Then a 2x4 cut to fit from side to side was added, turning our 12 foot beds into 3- 4 foot sections.


 In the above photo, you can see the 2- 4 foot square beds at the top of the hill


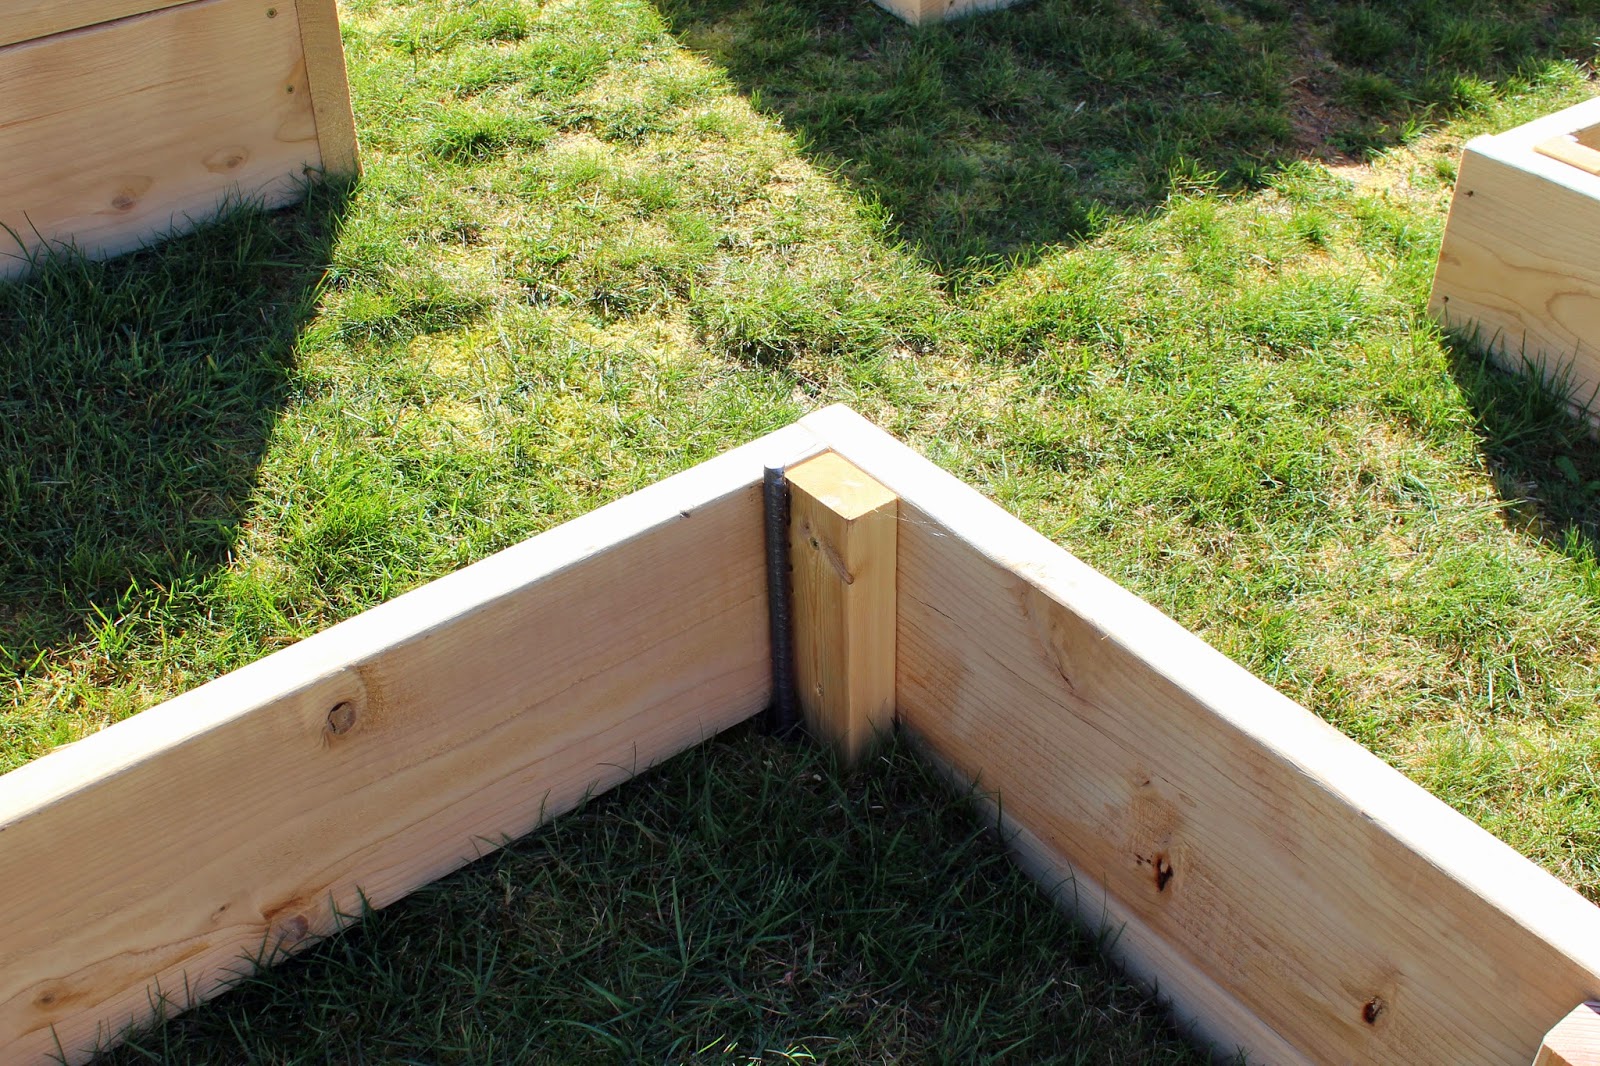
Since the decline in the yard is fairly steep, we needed to prevent the garden beds from "walking" down the hill over time.  In hopes of preventing this, we hammered rebar in the ground at the corners of the upper sides of the garden beds.    Now the beds are ready for compost!  

Rebar holding the beds in place on the hill


After using an online calculator, we decided to order 16 yards of organic compost.  One calculation was that we needed 18 yards, but we decided to get 16 and see how far that would go.  I wanted to have a mix of a few different composts, but the landscaping place we ordered from only offered 2 different kinds that were certified organic so we ordered 8 yards each of the two different types. 

16 yards of certified organic compost

Since actually mixing the compost wasn't an option, the two types of compost were loaded alternately in the truck and "mixed" a bit when dumped onto the driveway.  That pile in the photo above was bigger than it actually looks.  I was standing a little above it taking the photo since our driveway slopes up towards the road.  The two types were "regular" compost (yard debris & kitchen scraps, I'm assuming) and "fish" compost (fish scraps & yard debris).

Filled & ready for planting!

After a full day's work .......my son & I worked from about 9:30am until 8pm, with my husband joining in at about 4pm once he was home from work.......we had all the beds filled and had a couple of yards of compost left.  After a good rain settled all the compost down, we topped them off again and still had compost left to top-dress some flower beds.

The lonely little bed at the bottom of the hill

Stay tuned for planting day....or should I say planting days, weeks?  It's been slowly coming along,but we're getting there!


Wednesday, May 28, 2014

The Vegetable Garden Construction Part 1

Well, I certainly didn't plan to wait a whole month to blog about the veggie garden.  Let's hope there aren't huge gaps like this too frequently.  I've learned that living a simple life can actually be time-consuming when just getting started in a new place!

Garden bed above.....Collards, Red Russian kale & Dwarf Siberian Curled kale, May 27th


Our back yard is pretty large, but is a continuous slope starting just off the deck and continues down to the bottom fence line where it begins to level off.  Because of this, planting an in-ground garden wasn't possible so we needed to build raised beds.  Lots of large raised beds for the amount of planting I want to do!
My husband took a week off from work to accomplish this task and we hoped it wouldn't rain too much.
Day one (March 31st) All large beds constructed & joined

I decided that we needed 9- 4x12 ft beds, 1- 4x8 ft bed, and 3- 4x4 ft beds.  Due to the small size of our truck and not wanting to pay delivery fees, we opted to build 8 ft & 4 ft beds and join them together to make up the 12 ft length we wanted.  You could certainly opt to make 2- 6 ft beds and join them together, but we chose to work with 8 ft length lumber to make shopping easier.  

Day two (April 1st) 8 of the large beds lifted with "legs" and leveled

After much debate and consideration, we opted to buy untreated, standard 2"x 8" lumber in 8 ft lengths to build the "top level" of the garden beds.  For the legs, we used 2"x 3" lumber, however standard 2"x4"s could have been used.

Day 8 (April 7th) All beds finished off & enclosed

Because our backyard has such a steep slope (not sure of the degree), to fill in the bottom half of the beds, we had to use 2"x 10"s that were trimmed to fit the space.  This took a little time, but worked out well.  After a week's worth of work, we were pleased with the results!  

Stay tuned....Next up...bracing and anchoring the beds to keep them in place....and then filling with compost (lots of it!) and planting.